

Finally I have some time to get Crafty!! Christmas is just around the corner and it is a great time to create ♥.
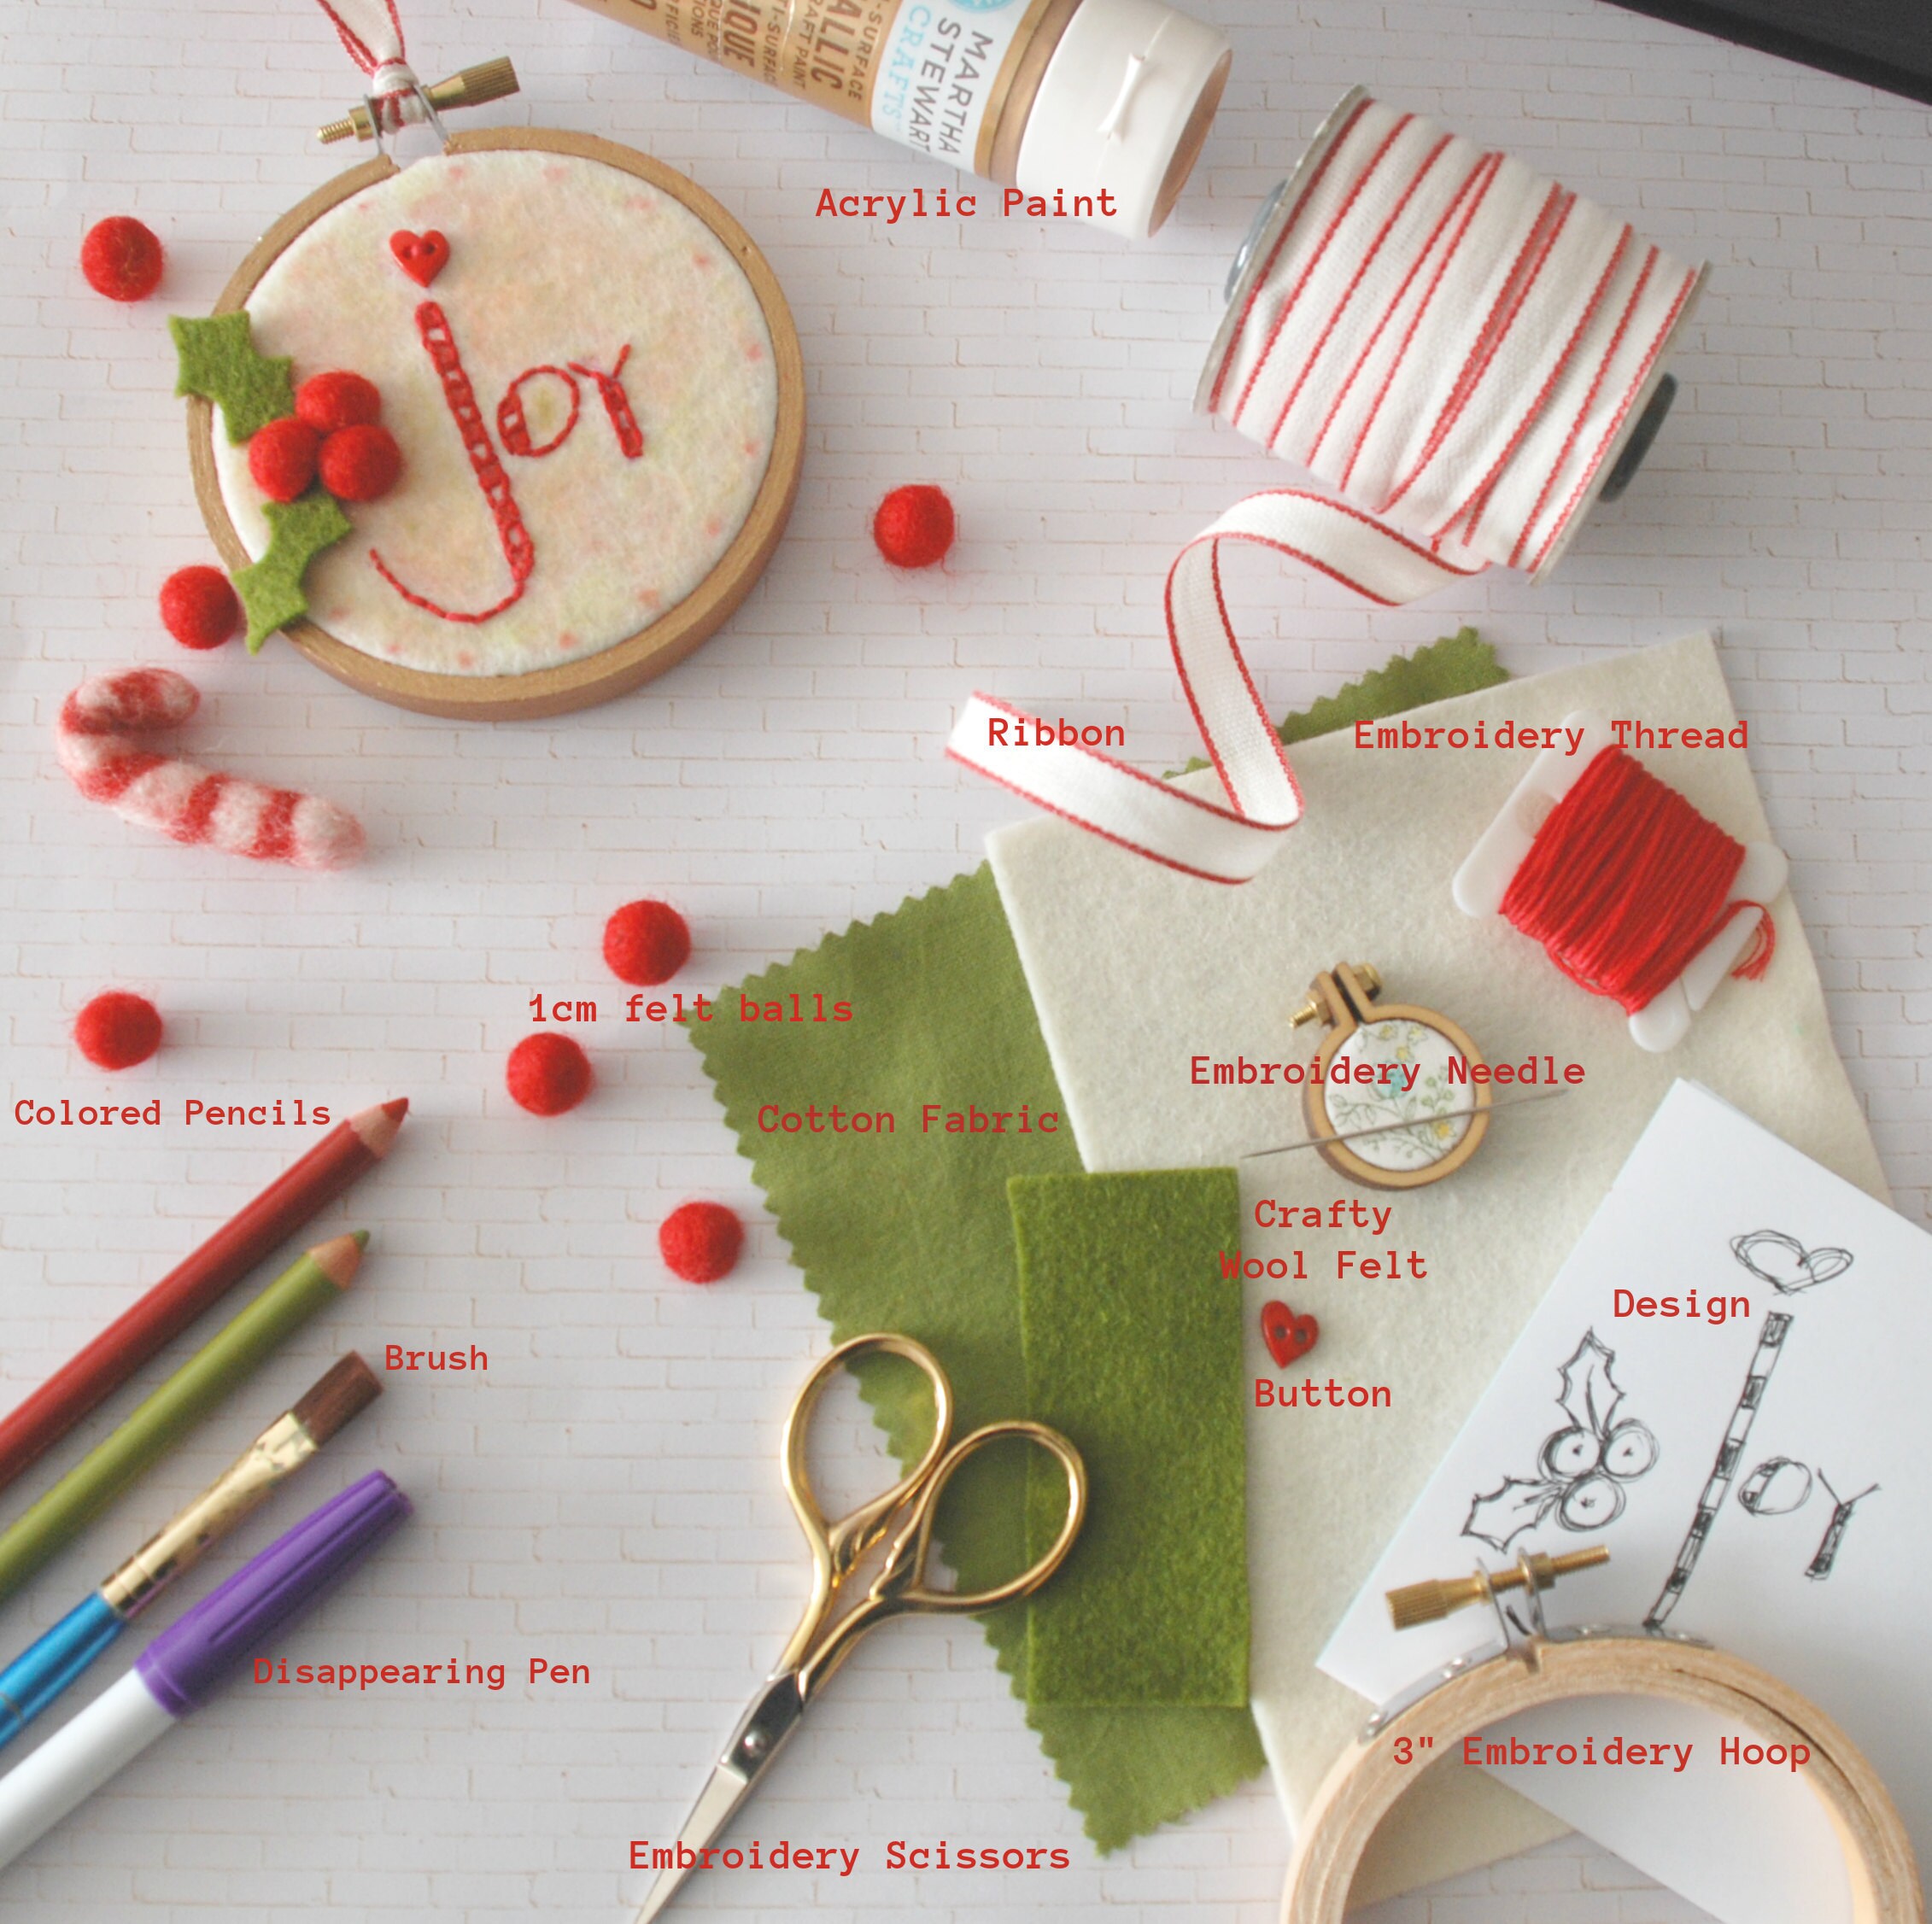
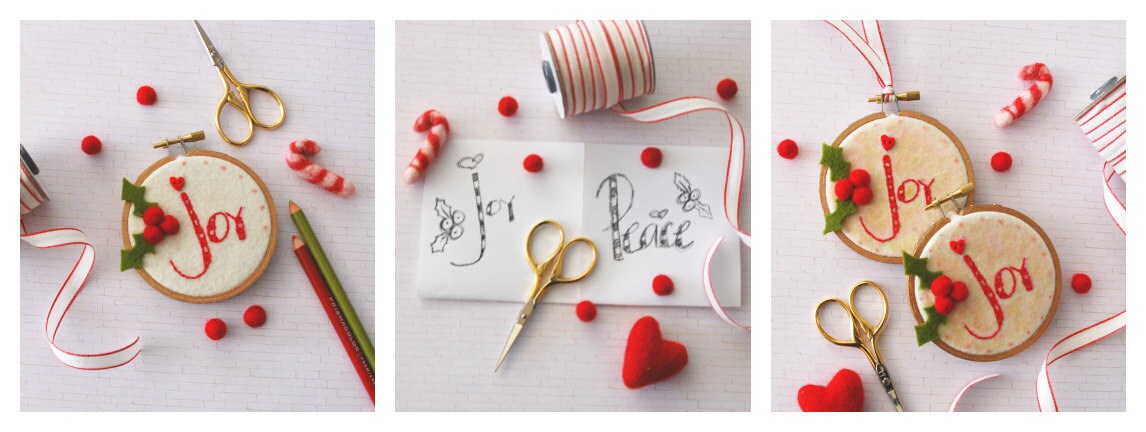
DIY#1 - Holly Berry Hoop Art/Ornamets: Super easy Christmas Ornaments, here is what you need;
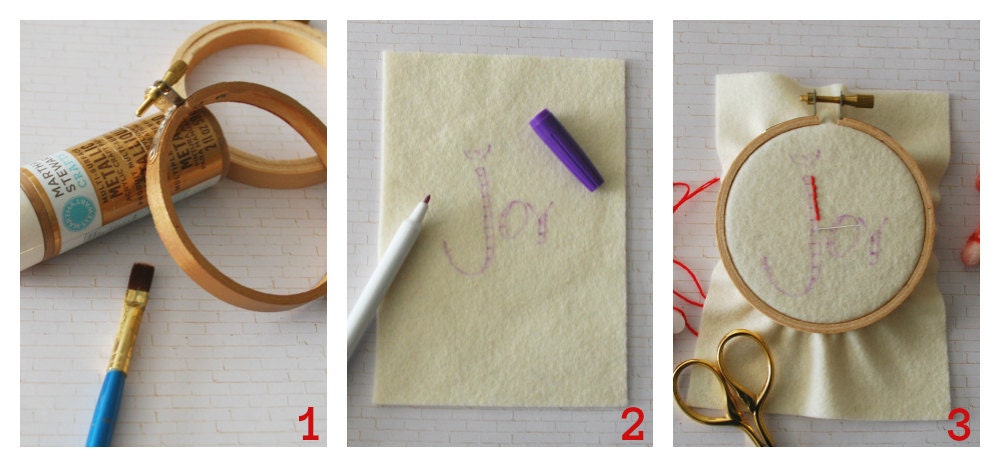
1. Add some Metallic Acrylic paint to the outer hoop, make sure it is completely dry before usting. (optional)
2. Using your Disappearing Pen, draw your desing onto the Crafty wool felt piece.
3. Start Stitching (I used the Back Stitch -------)
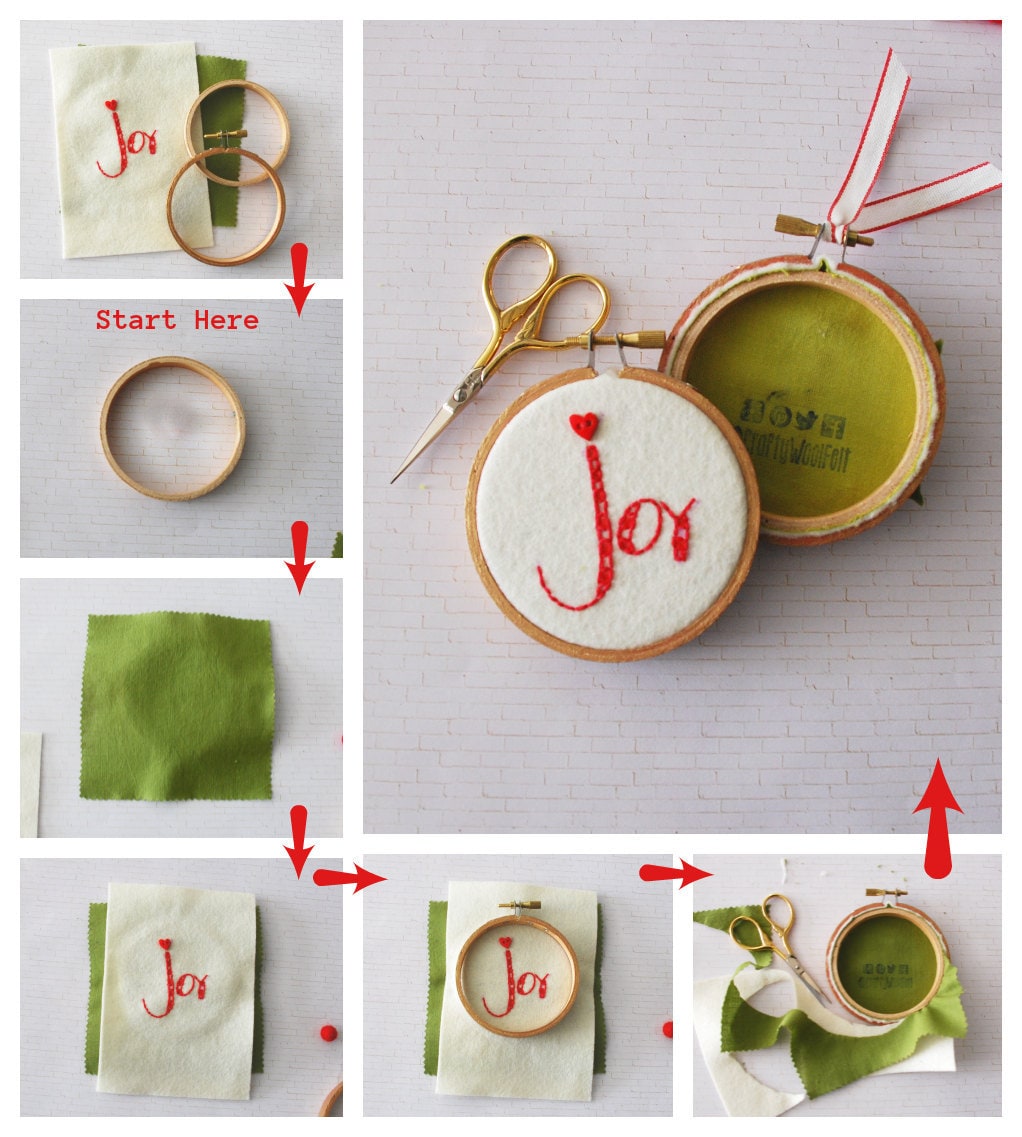
4. Let's set the the stitched design onto the embroidery hoop! Follow the steps below. Make sure to center it nicely!
5. Let's prepare the Holly Berry... using a cute but sharp pair or scissors, cut the 1cm felt balls in 1/2 to represent the berries. Using your disappearing pen draw 2 little Holly Berry leaves on the scrap of Olive Crafty Wool Felt.
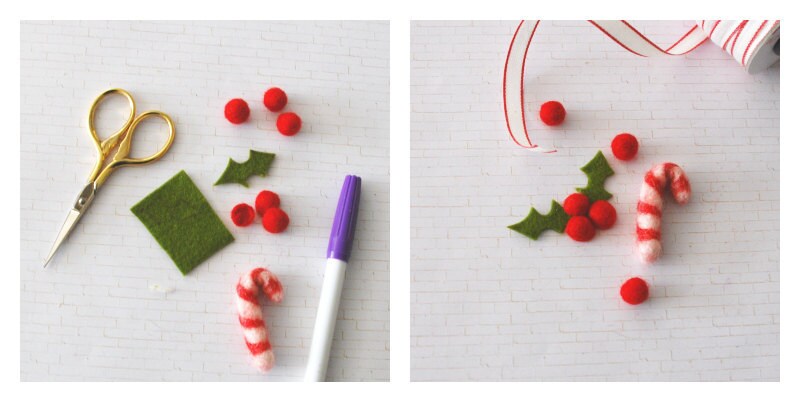
6. My favorite part after stitching it is the embelishment ... just go crazy with it! I love using colored crayonds as the wool felt take it beutifully! You can either stitch the Holly Berry onto the hoop or glue it using a hot glue gun. Add some stitches to the leaves and berries to give more detail to it. Once you have it ready, add the ribbon for decoration or for hanging if use as ornament.
Oh I had so much fun designing these!! The Holly Berry Hoop Art line will be available as kits in the shop on July 2018, the kit will include all you need to make this cute and easy Ornaments so stay tuned!
All ideas and designs in this post are 100% my own for Crafty Wool Felt!
Happy Crafting! And from them bottom of my Crafty Heart, thank YOU so much for visitng my blog and for shopping Crafty ♥.
Enjoy,
Claudia - ^-^
#hollyberry #hoopart #handmade #ornamets #tutorial #christmasblog #christmascrafts #craftywoolfelt #woolfelt #easycrafts #holidaycrafts #stitching #embroidery #givehandmade